TL;DR

Turn the school run and nap time into listening time
- Thousands of audiobooks, podcasts and originals
- Listen on your phone, tablet or Echo — also offline
- Cancel anytime
Choose a child car seat by your child’s height, weight, development, and the seat’s limits, then follow both the seat and vehicle manuals for installation. Keep your child rear-facing until they reach that seat’s stated limit, use each next stage within its limits, and check local laws and official recall notices.
A car seat can look snug and still be installed the wrong way. The difference matters: correctly used child restraints reduce the risk of death and serious injury in a crash [1].
You’ll learn how to match a seat to your child’s stage, check the harness and vehicle-belt fit, and avoid common setup mistakes. Rules and approved products vary by country, so use your local road-safety authority and the exact seat and vehicle manuals as your final guides.
Keep your child rear-facing until they reach the rear-facing seat’s stated height or weight limit, subject to local law.
Use each seat stage until the child reaches that seat’s limits; age alone does not determine when to move up.
Check belt fit in the actual vehicle: lap belt low on the upper thighs, shoulder belt across the chest and shoulder.
Read both manuals and use only the installation method they approve; combine the seat belt and lower anchors only with explicit manufacturer approval.
Check seat history, service life, condition, and official recall listings before using a secondhand seat.
Why the right car seat matters at every stage
Child safety car seats are restraints designed to protect children who are too small for an adult vehicle belt to fit correctly. The right seat depends on your child’s height, weight, development, and the seat’s limits, not age alone. Fit and installation both count because a restraint can only manage crash forces as intended when it holds the child in the right position and is secured in an approved way.
In a crash, a restraint keeps a child positioned so the seat can do its job. A seat that is too small, used with loose straps, or attached by an unapproved method may not protect as intended [1]. Imagine a winter school run: your child is buckled in, but a puffy coat leaves extra space beneath the harness. That gap can let the child move farther before the harness restrains them, so the coat can undermine an otherwise suitable seat. Buckling over thinner clothing and adding warmth over the harness addresses the fit without changing the seat.
Seat approvals and traffic laws differ by country. Before buying, check what your local road-safety authority requires, then compare the product label with your market’s approval rules. In Europe, for example, UN Regulation No. 129, commonly called i-Size, operates alongside older approval categories during a transition period; it is not a worldwide standard [2]. This matters because a seat that is available online or used by a family elsewhere may not be approved where you live. Confirming approval first narrows the choices to seats whose testing and use requirements apply in your market.
Know which seat stage fits your child now
Child safety car seats generally move through rear-facing, forward-facing with a harness, and booster stages before a child uses the vehicle belt alone. Move up when your child reaches the current seat’s stated limits and local rules allow it. A birthday by itself is not the signal: children of the same age can differ in size, and seats have different limits. Moving too early may leave a child with less support than the next stage is designed to provide.
Consider a toddler who has just turned two but still fits within the rear-facing limits of their seat. Their next stage depends on those limits and local guidance, not pressure to match another family’s routine. Keeping a child rear-facing as long as the seat allows is the usual safety guidance [1]. In this position, the seat supports the head, neck, and spine together during a frontal crash. The tradeoff is practical space: rear-facing seats can take up more room, so check the vehicle and seat instructions for an approved position rather than changing stages simply to make the front passenger area more convenient.
- Rear-facing: Supports the head, neck, and spine during a frontal crash. Use it until the child reaches the seat’s stated maximum height or weight, subject to local law.
- Forward-facing harness: After the rear-facing limit, use a seat with its harness and top tether when the seat and vehicle instructions call for it. The harness holds the child in position, while the tether can limit forward movement; keep using the seat until the child reaches its limits.
- Booster: Raises the child so the lap-and-shoulder belt sits across the upper thighs, chest, and shoulder. It is generally used after the child outgrows the harness seat, within local rules and booster limits. Its job is to improve belt fit, so it cannot compensate for a belt that still crosses the belly or neck.
- Vehicle belt: Use it without a booster only when it fits properly and the child can keep that position for the whole ride. A good fit while sitting upright at the start is not enough if the child later slouches or leans, because the belt can shift away from the areas it is meant to restrain.
Children are generally safest in the back seat, especially those younger than 13, where local law and vehicle guidance allow. Never put a rear-facing seat in front of an active frontal airbag [1]. An airbag deploys toward the front passenger area, where it can strike a rear-facing seat with force; the vehicle manual can identify approved seating positions and any airbag restrictions.
How to check the seat belt fit before retiring a booster
Child safety car seats include boosters, which position the vehicle belt to fit a child’s body. Your child is ready to use the belt without a booster only when the belt fits properly and they can stay seated that way throughout the trip. Check the fit in the vehicle they ride in; back-seat shapes can vary, and a belt that fits in one car may sit differently in another.
Try this on a short, parked-car check. Your child sits all the way back with knees bending naturally at the seat edge; the lap belt rests low over the upper thighs, while the shoulder belt crosses the chest and shoulder. This positioning lets the vehicle belt engage the sturdy parts of the body it is meant to restrain. If the lap belt rides up over the belly or the shoulder belt cuts across the neck or face, keep using an appropriate booster and check local rules [1]. A booster helps correct the belt’s path; simply telling a child to sit differently cannot reliably fix a poor fit if the seat shape or belt geometry keeps pulling them out of position.
A child who fits well for the first five minutes but slouches or leans out of position later may still need the booster. The fit has to hold for the ride, not just for a quick photo. Age alone cannot tell you that. Recheck the fit as the child grows and when they ride in a different vehicle, since either change can affect where the belt rests.
Install the seat with this five-point manual check
Child safety car seats should be installed using a method and seating position approved by both the seat maker and vehicle maker. Follow both manuals, then check movement at the belt path as the seat instructions describe. The manuals matter because vehicle belts, anchor positions, and seat designs vary; a method that works for one combination may not secure another. A seat feeling “pretty solid” by hand is not a substitute for those directions.
- Check compatibility: Read the car-seat manual and vehicle owner’s manual for approved seating positions and installation methods. This helps prevent choosing a spot where the vehicle has no compatible anchor or where the seat cannot sit as intended.
- Choose one method: Use the vehicle belt or lower anchors as directed. Do not combine them unless the seat manufacturer explicitly permits it; two attachment methods do not automatically make the installation stronger and can change how the seat moves in a crash.
- Secure the seat: Tighten it and check movement at the belt path, staying within the amount specified in the manual. That check focuses on where the seat is attached, rather than movement at the top that may not show whether the installation is secure.
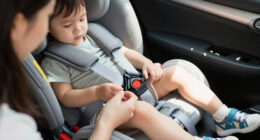
- Fit the harness: Route and tighten the straps as instructed. Place the chest clip, if the seat has one, at the manufacturer’s specified height. Correct routing and snug straps keep the child in the position the restraint was designed to hold.
- Use the top tether: For a forward-facing seat, attach it when the seat and vehicle provide one and the instructions call for it. The tether helps limit forward movement, so leaving it unused when required can reduce the intended restraint performance.
For example, a seat may feel tight when you pull at its top but move too much near the belt path. Check where the manual tells you. If you cannot get a secure approved fit, contact a qualified local child-passenger-safety technician or inspection service, where available. Resolving that fit before travel can help distinguish an installation problem from a seat that is incompatible with that vehicle position.
Avoid the everyday mistakes that weaken a good setup
Child safety car seats can be used incorrectly even when the model suits the child. Frequent errors include moving a child to the next stage too early, using a seat they have outgrown, and leaving harness straps twisted or loose. These mistakes matter because the child may not stay properly positioned when the restraint needs to manage crash forces. Small adjustments make a practical difference.
Take the puffy-coat example from earlier: buckle and tighten the harness with the coat off, then add warmth over the harness. Also check the belt path before each new installation, since it is easy to route a belt through the wrong guide when you’re in a hurry at daycare pickup. A quick manual check at that moment can prevent a belt that looks connected but does not secure the seat along the approved path.
- Check that the seat is not damaged, missing parts or labels, or subject to an unresolved recall. Missing parts or uncertain approval can make it hard to confirm the seat is being used as designed.
- Do not assume a used seat is safe because it looks clean; ask about its history and service life, and follow manufacturer guidance. Appearance cannot reveal crash history, wear, or whether the seat has reached its service-life limit.
- Check that the installation does not interfere with safe belt fit or another passenger’s restraint. A crowded arrangement can lead to an improperly buckled neighboring seat or a child belt that no longer lies correctly.
- Recheck the harness and installation after moving the seat between vehicles. Differences in belt hardware, anchor locations, and seat contours can change how well the same seat installs.
Many seats have a manufacturer-set service life, but the period varies by model. Find the date on the label or in the manual rather than guessing. Check the official recall database for your location, including the U.S. Consumer Product Safety Commission (CPSC) recall information if you are in the United States [3]. A recall may require a repair, replacement, or other action, so checking the exact model and following the notice helps you know whether the seat can still be used as it is.
Get reliable answers on secondhand seats and crashes
Child safety car seats bought secondhand need a known history and a careful condition check. You should be able to confirm that the seat has not been in a crash that requires replacement, has no damage or unresolved recall, includes its parts and labels, and remains within its service life. Follow the manufacturer’s guidance and local rules. Each check answers a different question: history addresses crash exposure, condition and parts address whether the seat is intact, and labels and service life help confirm that its limits and instructions can still be identified.
Suppose a neighbor offers you a seat that looks nearly new but cannot say whether it was in a collision. Its fresh fabric cannot answer that question. When the history is unknown, you cannot confirm the seat meets those checks; ask the manufacturer or local road-safety authority what to do. This is a meaningful tradeoff with secondhand seats: a lower price or familiar source may help a budget, but it does not replace the information needed to judge the seat’s condition and use history.
Crash replacement advice depends on the crash, seat maker, and local rules, so do not assume every collision has the same answer. Check the seat manual and contact the manufacturer, insurer, or road-safety authority for the guidance that applies. If installation help is available nearby, an officially recognized inspection service can check your setup in person. Getting advice from the source responsible for that seat or local rule is especially useful when general online guidance cannot account for the crash details or model-specific instructions.
What recent seat changes mean for your shopping list
Child safety car seats have evolved to address changing approval rules, child sizing, and easier installation. Some regions now use standards that include updated child-size ranges and may address side-impact performance. These changes do not remove the need to check the specific seat’s label, limits, manual, and approval for your market [2]. A standard describes requirements for approved products in that system; it does not mean every seat fits every child or vehicle equally well.
Some approval systems classify seats by height rather than relying only on weight bands. More models also accommodate rear-facing use for longer, while labels, built-in lockoffs, and level indicators can make setup easier. For a parent choosing between two seats, those features can make a late-night installation less fiddly, but they do not replace the instructions. The practical tradeoff is that convenience features may make a correct setup easier to repeat, while fit, compatibility, and the child’s limits still determine whether that particular seat is suitable.
Standards and available models change over time. Before buying, verify current details with your local regulator and confirm that the seat fits both your child and vehicle. A clear indicator helps; the manual remains the final guide. If possible, checking the fit in your own vehicle before purchase can reveal space or installation constraints that a product description cannot show.
Frequently Asked Questions
When should my child switch from rear-facing to forward-facing?
Switch when your child reaches the rear-facing seat’s stated height or weight limit, subject to local law. A particular birthday alone does not set the timing.
How do I know if my child still needs a booster?
Your child generally needs a booster after outgrowing the forward-facing harness seat if the vehicle belt does not yet fit properly. The lap belt should lie low across the upper thighs, and the shoulder belt should cross the chest and shoulder.
Is the middle back seat always the safest place?
The middle can provide more distance from side impacts if the restraint installs correctly there. A secure installation in another approved rear position is preferable to a poor fit in the middle.
Can I install a seat using both the vehicle belt and lower anchors?
Only if the seat manufacturer explicitly allows that combination. Otherwise, use the single method listed in the seat and vehicle instructions.
Where can I check whether a car seat has been recalled?
Use the official product recall database for your country and search by the seat’s brand and model. In the United States, check CPSC recall information; elsewhere, use the relevant national product-safety or road-safety authority.
Conclusion
Match the seat to your child, follow both manuals, and check the fit every time you change stages or vehicles. When the setup feels uncertain, get help from a qualified local inspection service.
A well-fitted harness should feel snug and sit flat—quiet reassurance before the car rolls out of the driveway.
Fall Picks
fall essentials
As an affiliate, we earn on qualifying purchases.