
To install wall storage systems securely, start by accurately locating studs with a reliable stud finder, moving it slowly across the wall and marking the edges. Confirm your marks with multiple passes and draw vertical lines for guidance. Use appropriate hardware and secure mounting rails directly to studs or anchors suited for your wall type. Proper tools and attention to detail guarantee safety and durability. Keep exploring to master every step for a perfect installation.
Key Takeaways
- Use a reliable stud finder to accurately locate wall studs before mounting rails.
- Mark stud edges clearly and draw vertical lines to ensure proper alignment of mounting rails.
- Secure rails directly to wall studs with appropriate screws and hardware for maximum stability.
- Match mounting rails to wall material, choosing anchors or masonry fasteners as needed.
- Follow manufacturer instructions, use quality tools, and double-check measurements to prevent installation errors.

Stud Finder Wall Scanner – 5 in 1 Stud Finder Tool w/Smart Chip and HD LCD Display, Stud Detector Beam Finders for the Center and Edge of Wood AC Wire Metal Studs Joist Pipe (Yellow Feathers)
Accurate and Rapid: The wall stud finder adopts an intelligent micro-sensor chip with the highest sensitivity which can…
As an affiliate, we earn on qualifying purchases.
As an affiliate, we earn on qualifying purchases.
Why Accurate Stud Location Matters for Wall Storage Safety
Accurately locating wall studs is essential because they provide the necessary support for wall storage systems. When you find the studs correctly, you help assure stud safety, reducing the risk of damage or accidents. Properly anchored storage units rely on sturdy studs to hold weight securely, preventing shelves or cabinets from falling. Misjudging stud locations can compromise wall integrity, leading to potential cracks or collapse over time. By pinpointing the exact stud positions, you guarantee that your mounting will be safe and durable. Remember, wall safety isn’t just about avoiding damage—it’s about protecting yourself and your belongings. Taking the time to locate studs accurately makes all the difference in creating a reliable, long-lasting storage solution that’s secure and safe for everyday use. Using proper stud-finding techniques can greatly improve your accuracy and confidence during installation. Being familiar with wall construction principles can also help you better understand how to identify studs effectively. Understanding building materials and their typical configurations can further enhance your ability to locate studs with precision. For example, understanding how different wall types are assembled can help you anticipate where studs are likely to be found, saving you time and effort. Additionally, knowing how to interpret stud markings on your wall can facilitate quicker and more accurate detection.

KURUI Drywall Anchors Assortment Kit for Sheetrock Concrete Brick, 350Pcs Wall Anchors and Flat Head Screws, 5 Sizes Picture Hanging Set for Bedroom/Office Wall Art Decor, House Warming Gifts New Home
5 SIZES FOR VARIOUS PROJECTS – This 350 pcs wall anchors assortment kit with self drilling drywall anchors…
As an affiliate, we earn on qualifying purchases.
As an affiliate, we earn on qualifying purchases.
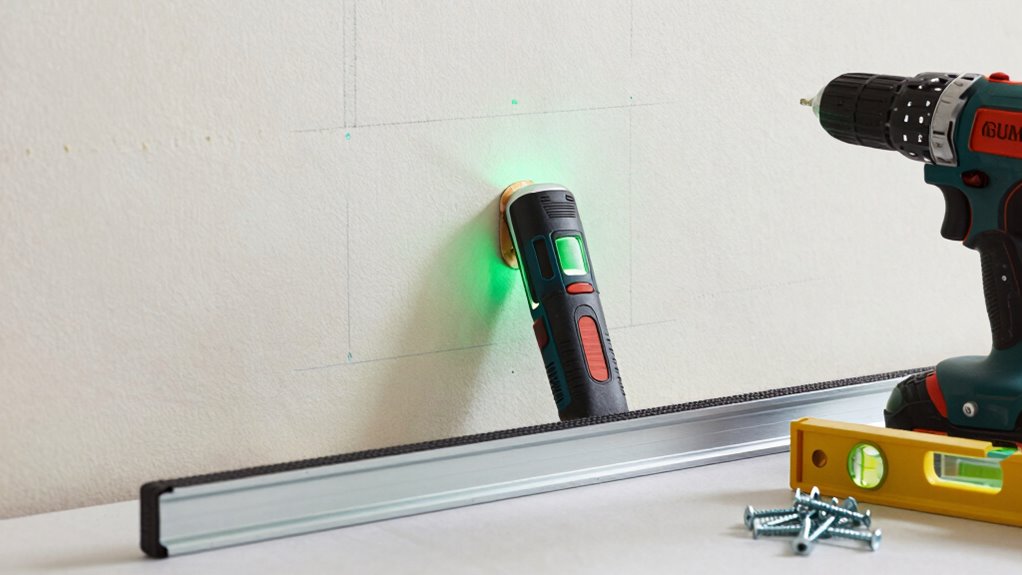
How to Use a Stud Finder Effectively
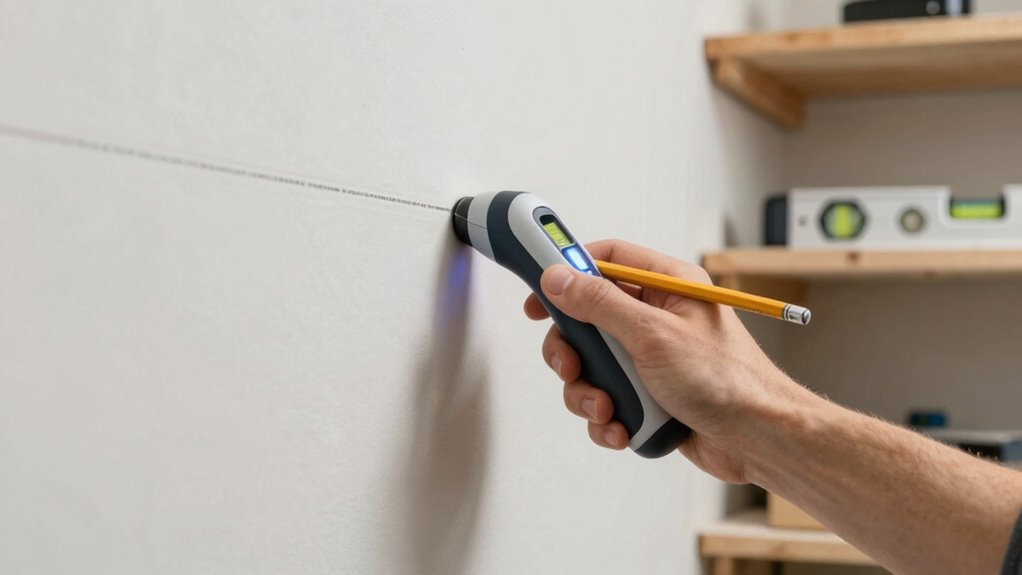
Using stud finder effectively starts with understanding how the device works and reading its instructions carefully. Familiarize yourself with its sensor types and calibration process. Proper stud finder techniques involve slowly moving the device horizontally across the wall, watching for signals that indicate stud edges. When you detect a stud, mark its center using a light pencil line. Use consistent wall marking methods to make certain of accuracy, such as marking both edges of the stud and then finding the center. Keep the finder flat against the wall to avoid false readings. Double-check your marks by slowly passing over the same area again. With practice, you’ll develop reliable wall marking methods that help you locate studs quickly and accurately, ensuring your wall storage system is secure and properly mounted. Understanding how stud placement varies within different wall constructions can also improve your accuracy. Additionally, being aware of building codes can help you identify safe locations for mounting heavier items. Being mindful of wall material differences can also influence your stud-finding success, as some materials may require different detection techniques. Recognizing wall thickness variations can further refine your ability to locate studs consistently. Gaining knowledge about wall structure can assist you in predicting stud locations even before you start scanning.

VGBUY 180PCS Conical Concrete Anchors and Screws Assortment Kit, 90PCS Concrete Wall Anchors, 90PCS Self Tapping Screws for Masonry Stucco Brick Cement Cinder Block Tile, with 2PCS Drill Bit
Valuable Cement Anchors And Screws Kit:This is a great value pack,Includes 30PCS # 12-16 (1.38 "length) anchors, 30PCS…
As an affiliate, we earn on qualifying purchases.
As an affiliate, we earn on qualifying purchases.
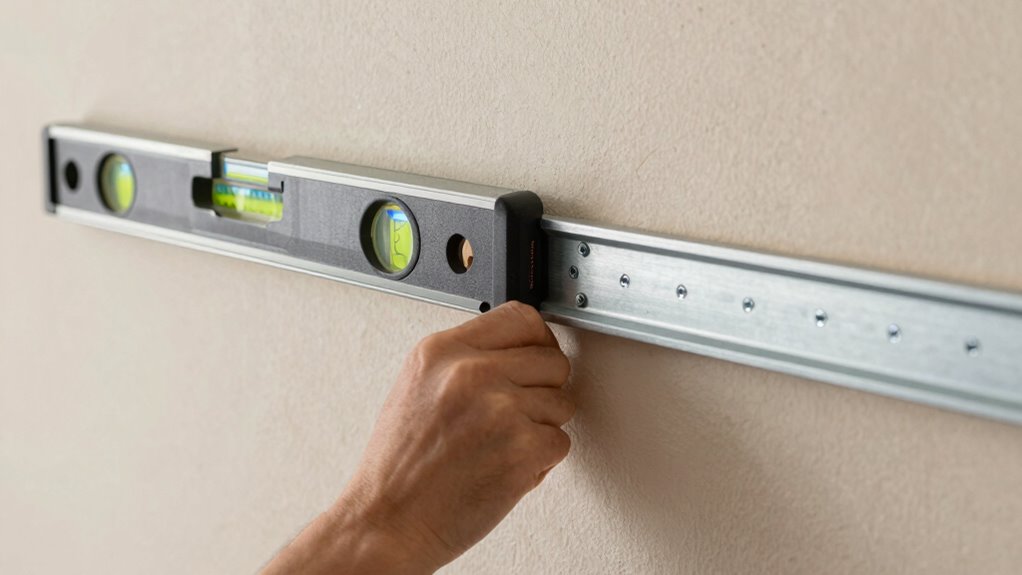
How to Mark and Confirm Stud Positions Before Installing
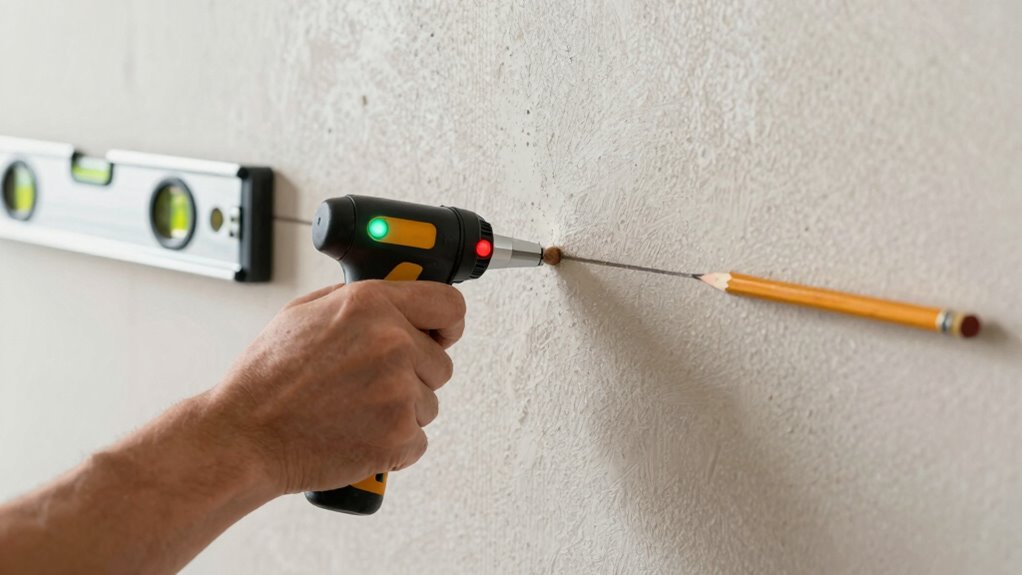
Before you start installing your wall storage system, making sure to mark and confirm the stud positions precisely is essential. Use a reliable stud finder to locate the studs behind the wall. Once it signals a stud, mark its edges with a pencil using clear, straight lines. To improve accuracy, double-check each mark by sliding the stud finder along the wall; it should consistently indicate the stud’s edges. Employ marking techniques like drawing vertical lines down from the edges to create a reference line, or marking the center point of each stud. After marking, confirm your marks before proceeding to guarantee your brackets or rails are securely anchored into the studs. Understanding how to locate wall studs accurately can help prevent damage and ensure a secure mount. Additionally, verifying the spacing between studs can help align your hardware properly and avoid unnecessary adjustments later. Knowing the typical stud spacing in your wall type can streamline your installation process, and being aware of stud spacing variations can help you adapt to different wall constructions more effectively. Recognizing that standard stud spacing often follows certain measurements can further simplify your planning.

Triton 5-600 Storability LocBin Wall Mount Strip For Plastic Hanging Bins (LocBins), 2 pack
Mounts to any flat wall surface
As an affiliate, we earn on qualifying purchases.
As an affiliate, we earn on qualifying purchases.
How to Choose the Best Mounting Rails for Your Wall Type
Choosing the right mounting rails depends on your wall type, so make certain they’re compatible before installing. Consider the material of your walls—drywall, brick, or concrete—and select rails designed for that surface. Also, prioritize durability to ensure your storage system stays secure over time. Additionally, researching installation best practices can help you achieve a safe and reliable setup. Consulting material specifications can further ensure the rails are suited for your particular wall surface.
Compatibility With Wall Types
Selecting the right mounting rails begins with understanding your wall type, as not all surfaces support the same hardware. Different wall types present unique compatibility issues, so choosing rails suited to your wall guarantees secure installation. For example:
- Drywall walls may need anchors or special brackets to distribute weight.
- Concrete or brick walls require masonry anchors and heavy-duty screws.
- Wooden studs support most rails but vary in spacing and strength.
Knowing your wall type helps you avoid compatibility issues that could lead to failure or damage. Always identify whether your wall is drywall, masonry, or wood stud-based before selecting mounting rails. Proper matching ensures your storage system stays secure and safe, preventing costly mistakes and reinstallation.
Material and Durability
The material and durability of mounting rails directly impact how well your storage system performs and how long it lasts. Choosing the right material depends on your wall type and the weight you’ll support. Metal rails, like steel or aluminum, offer high strength and resistance to warping, making them ideal for heavy loads. Plastic or composite options may be suitable for lighter items but tend to be less durable. When selecting materials, consider durability testing results to guarantee longevity. Here’s a quick comparison:
| Material | Durability Testing Results | Best For |
|---|---|---|
| Steel | High resilience, corrosion-resistant | Heavy-duty storage |
| Aluminum | Lightweight, corrosion-resistant | Moderate weight items |
| Plastic | Less durable, prone to wear over time | Light, temporary setups |
Additionally, examining material performance can help ensure you select the most reliable mounting rails for your specific needs. Proper understanding of piercing care and hygiene can also aid in maintaining wall-mounted systems that require minimal maintenance and reduce the risk of damage or infection. Regular inspection and installation best practices are essential for maximizing the lifespan of your storage system. Moreover, considering mounting techniques can significantly improve the stability and safety of your mounted storage. Ensuring that you choose appropriate hardware can further enhance the durability and security of your wall-mounted storage solutions.
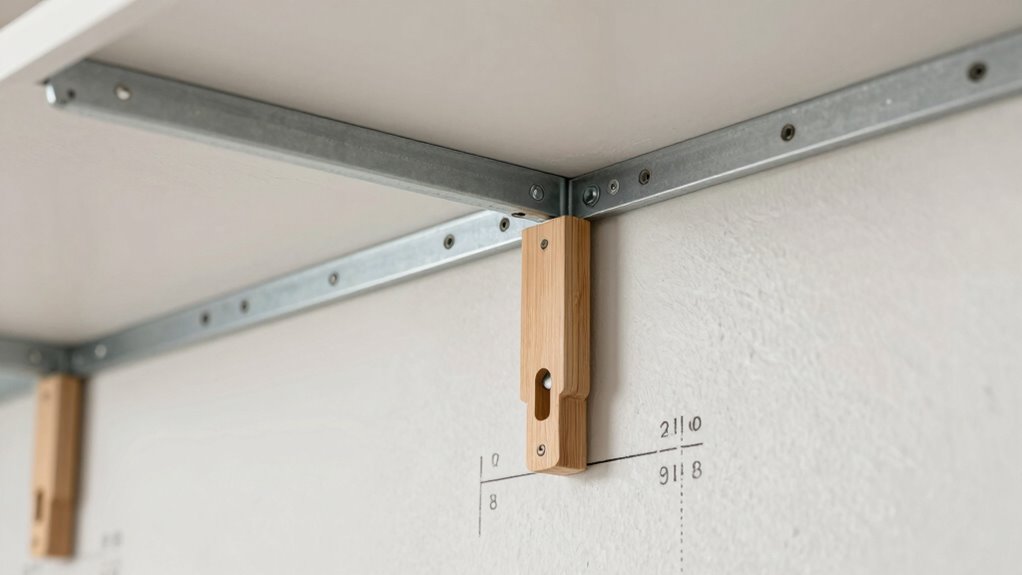
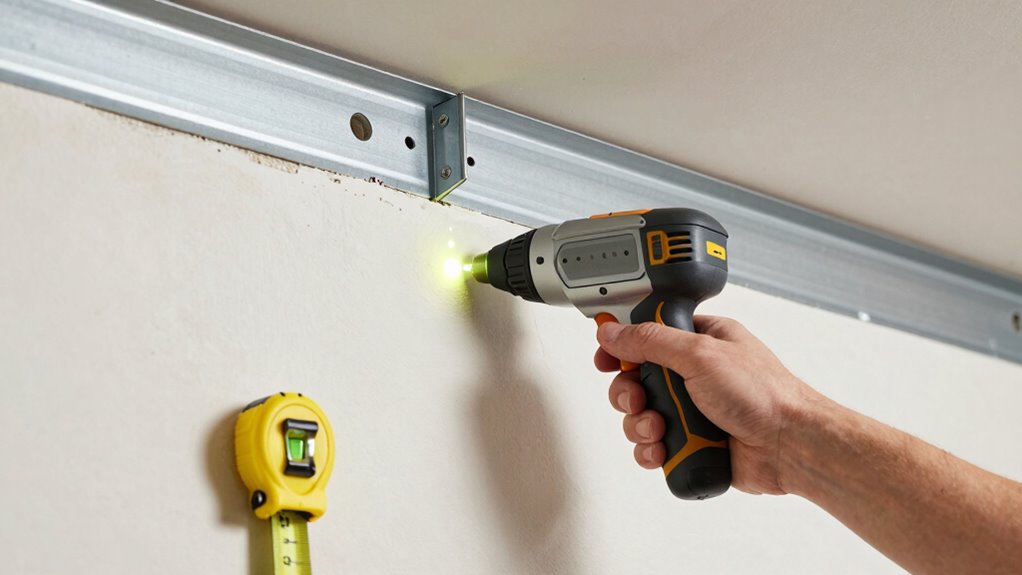
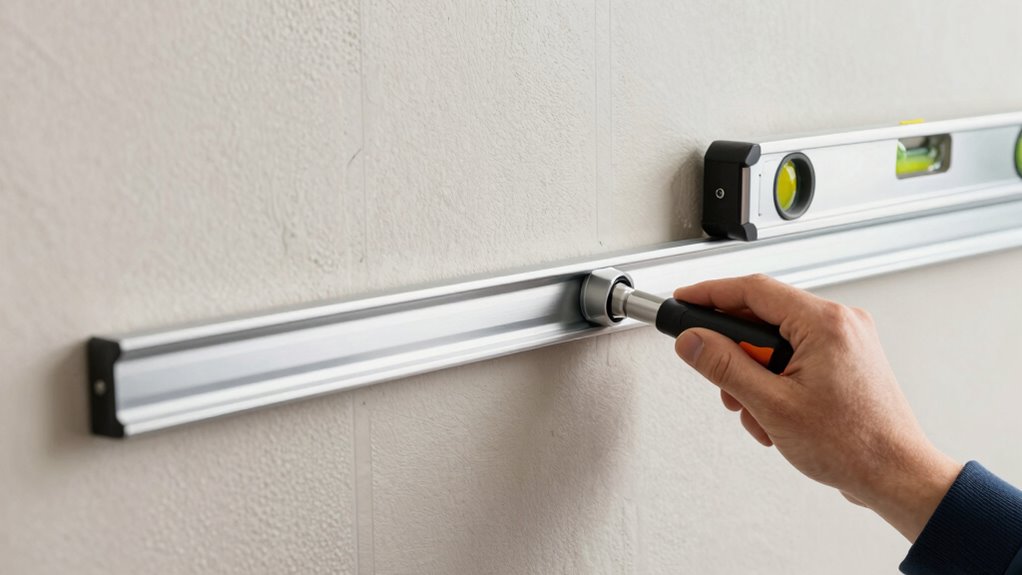
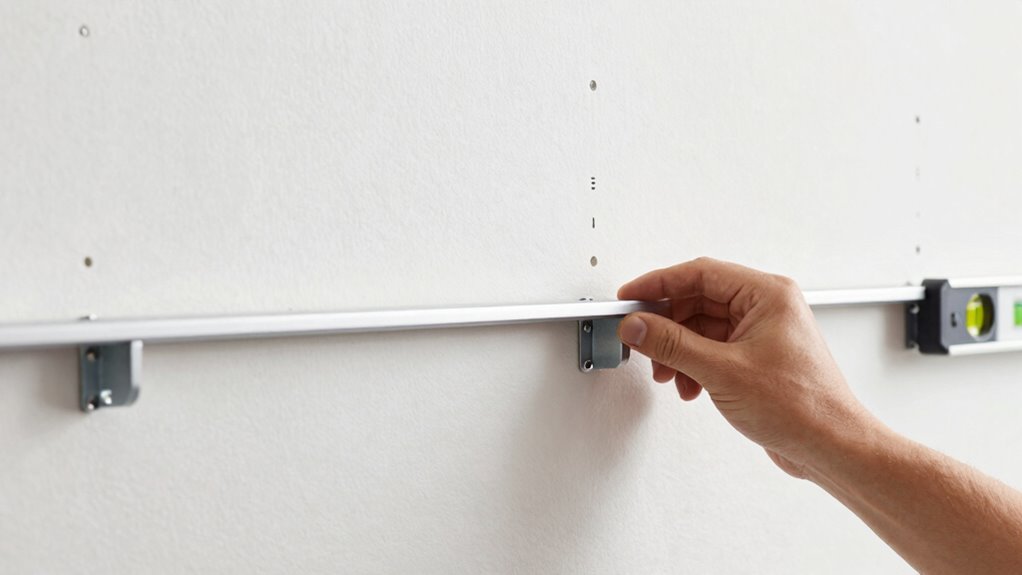
How to Secure Mounting Rails Safely and Properly
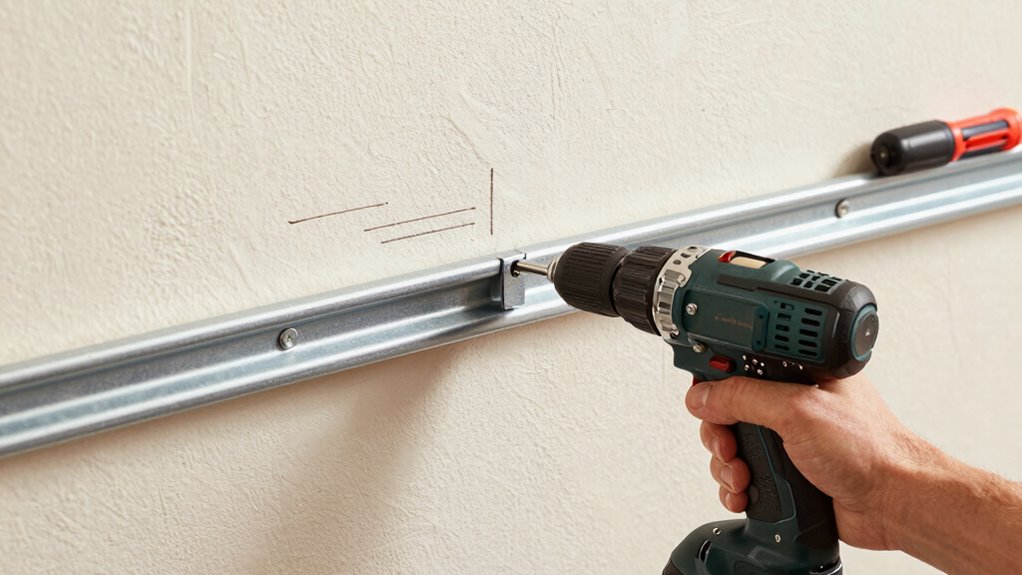
Securing mounting rails properly is essential for guaranteeing your wall storage system stays safe and stable. To do this, locate the wall studs or use appropriate wall brackets designed for your storage unit. Make sure you have the right tools, like a drill and level, to ensure straight installation. When attaching the rails, consider these key points:
- Use a stud finder to identify solid support points for your wall brackets
- Drill pilot holes to prevent wood splitting and ensure precise placement
- Secure the rails tightly with appropriate screws, ensuring they’re flush against the wall
- Remember that well-sourced coverage ensures the reliability of your installation advice and helps prevent accidents. Additionally, choosing high-quality hardware can significantly improve the overall stability of your wall storage system. Properly securing load-bearing support ensures the weight is evenly distributed and reduces the risk of failure. This approach helps distribute the weight evenly and prevents accidents. Properly secured mounting rails create a sturdy foundation for your storage unit, keeping everything safe and secure.
Common Mistakes When Installing Wall Storage and How to Avoid Them
Installing wall storage might seem straightforward, but overlooking common mistakes can compromise stability and safety. One key error is incorrect stud spacing; assuming standard distances without verifying can lead to mounting on weak spots. Always locate studs accurately before drilling, ensuring your anchors hit solid wall reinforcement. Failing to check for proper wall reinforcement can cause the system to loosen or fall. Avoid using the wrong type of anchors or mounting hardware for your wall type, as this weakens the hold. Additionally, neglecting to confirm that your mounting rails are level can result in uneven storage and added stress on the mounts. Take the time to find studs, verify wall reinforcement, and use appropriate hardware to ensure a secure, lasting installation.
Troubleshooting Tips When Studs Are Hard to Find

When studs are difficult to locate, it can be frustrating, but there are effective techniques to make the process easier. First, use reliable stud finder tips, like calibrating your device on a known stud or testing different settings. Second, remember that studs are typically spaced 16 or 24 inches apart, so measure carefully from corners or outlets. Third, if your stud finder isn’t working, tap lightly along the wall—solid sounds often indicate a stud’s presence. If locating a stud proves impossible, drywall anchors are a good alternative for mounting lighter items securely. Visual cues like nail or screw holes can also help identify stud locations. Combining these methods ensures you’ll find studs more consistently and avoid unnecessary damage or mounting issues.
Essential Tools and Materials for a Secure Wall Mount
To guarantee your wall storage is secure, you need the right tools for the job. Having a drill, level, and appropriate fasteners makes installation smoother and safer. Equally important are the materials that provide stability, like strong anchors and sturdy mounting brackets.
Tools for Wall Mounting
Are you equipped with the right tools for a secure wall mount? Having the proper tools makes all the difference in ensuring your storage system stays safe and sturdy. You’ll need a stud finder to locate the studs behind the wall, ensuring your mounting brackets are anchored into solid wood. A drill will help you drive screws efficiently, while a level guarantees your setup is perfectly aligned. Picture these essential tools:
- Stud finder to locate strong mounting points
- Mounting brackets for secure attachment
- Drill and screwdriver for precise installation
With these tools, you can confidently locate studs, position brackets accurately, and secure everything tightly. Skipping any of these steps could compromise your wall storage system’s stability, so invest in quality tools for the best results.
Materials for Secure Installation
Having the right tools for wall mounting is just the beginning; selecting the proper materials guarantees your storage system remains secure over time. A quality stud finder helps you locate the precise studs behind your drywall, ensuring your mount is anchored where it’s strongest. Once you’ve identified the studs, choose sturdy mounting hardware like heavy-duty screws, anchors, and bolts designed for your wall type. Using appropriate mounting hardware prevents your shelves or cabinets from loosening or falling. Make sure the hardware is rated for the weight you plan to carry. Combining a reliable stud finder with durable mounting hardware ensures your wall storage system stays secure, safe, and long-lasting, providing peace of mind with every load you add.
How to Maintain and Reassess Your Wall Storage Over Time
Regularly maintaining and reassessing your wall storage systems guarantees they remain functional and safe over time. Periodic checks help you spot loose screws, sagging shelves, or damaged materials before accidents happen. As you do this, consider how your wall decor and aesthetic enhancements might have shifted, affecting your storage’s look. To keep everything in top shape, you should:
- Tighten or replace mounting hardware as needed
- Inspect for signs of wear or damage in the wall or storage components
- Reevaluate your organization to ensure it still meets your needs and complements your decor
Adjusting your system periodically ensures it continues to serve its purpose while enhancing your space’s overall aesthetic. Staying proactive keeps your wall storage safe, functional, and visually appealing.
Frequently Asked Questions
Can Wall Storage Systems Be Installed on Drywall Alone?
You can install wall storage systems on drywall alone, but it’s not recommended for heavy loads. Use drywall anchoring to support lighter items, and always use a stud finder to locate studs for more secure mounting. When possible, attach mounting rails directly into studs to guarantee stability. Proper anchoring and stud use help prevent damage or accidents, especially with heavier or valuable storage systems.
What Weight Capacity Should My Wall Mounting Rails Have?
Your wall mounting rails should have a weight capacity aligned with the stud weight limits and rail strength guidelines. Typically, standard drywall studs support around 100 pounds each, so choose rails rated for at least that amount, preferably more for heavier items. Always verify the manufacturer’s specifications and confirm your rails are properly anchored to studs for maximum support. This guarantees your storage system stays secure and safe over time.
How Do I Repair Wall Damage After Installing Storage?
Ever wonder how to fix wall damage after installing storage? You should start with drywall patching to repair holes or dents. Use a putty knife to apply joint compound, then sand it smooth once dry. For larger holes, insert a drywall patch before joint compound. Do you want your wall looking seamless again? With patience and proper wall repair techniques, you can restore your wall’s surface easily and make it look as good as new.
Are There Specific Safety Precautions for High-Mounted Storage?
Yes, there are safety precautions for high-mounted storage. You should guarantee proper weight distribution to prevent the system from falling or causing damage. Always wear safety gear like gloves and goggles during installation and adjustments. Use a sturdy ladder and have someone assist you to maintain balance and stability. Double-check your mounting points and anchors to ensure they can handle the weight, keeping your safety a top priority.
How Often Should I Inspect Mounted Wall Storage for Safety?
Think of your wall storage as a living part of your home’s pulse; it needs regular checkups to keep beating strong. You should inspect your mounted storage at least every six months, performing safety checks to spot any signs of wear or looseness. Staying vigilant guarantees your system remains secure, preventing potential accidents. Regular storage inspection acts as your home’s safety net, catching issues before they cause trouble.
Conclusion
By following these steps carefully, you’ll guarantee your wall storage is both secure and safe. Remember, taking the time to accurately locate studs and choosing the right mounting hardware makes all the difference. Are you ready to confidently hang your storage system and trust in its stability? With the proper techniques, you’ll enjoy a clutter-free space without worry, knowing your setup is built to last.