
Using a high-quality laser level can make your DIY projects look professional by ensuring perfectly straight lines, accurate measurements, and precise alignment. Look for models with self-leveling features, bright visibility, and durability for outdoor use. Whether you’re tiling, hanging pictures, or framing, the right laser level helps you work faster and more accurately. Keep in mind the different types suited for your projects, and explore tips to improve your setup for flawless results.
Key Takeaways
- High-quality laser levels provide straight, precise lines for professional-looking DIY projects.
- Self-leveling features ensure accurate alignment with minimal effort.
- Bright laser beams improve visibility in various lighting conditions for consistent results.
- Weather-resistant models enable reliable outdoor use for construction and home improvement.
- Compatible accessories like mounts and target plates enhance setup stability and accuracy.
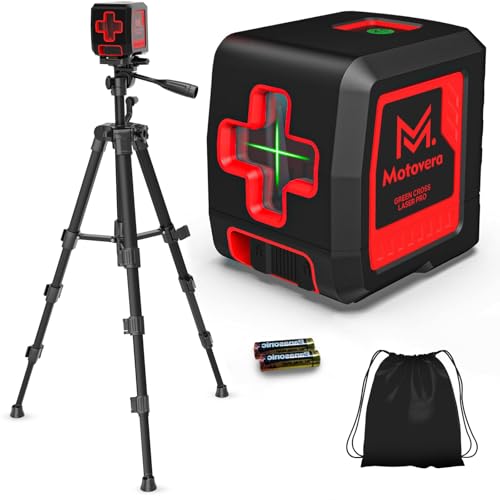
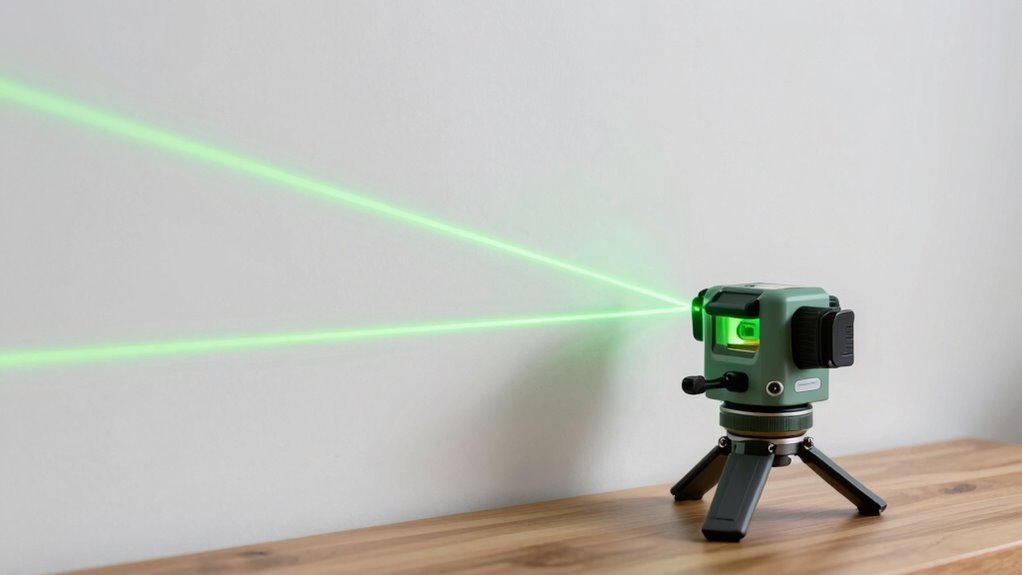
Motovera Self Leveling Laser Level 100ft, Green Cross Line with Tripod, 4 Brightness Modes & Pulse Function, Manual & Self-Leveling Modes, IP54 Waterproof for Picture Hanging, Tile, DIY Construction
【Ultra-Bright Green Beam & High-Precision Accuracy】Powered by an advanced green laser diode, this tool delivers 4X the brightness…
As an affiliate, we earn on qualifying purchases.
As an affiliate, we earn on qualifying purchases.
Why You Need a Laser Level for DIY Projects
A laser level is an essential tool for any DIY enthusiast aiming for professional-looking results. It ensures your lines are straight, levels are accurate, and measurements are consistent across projects. To keep your laser level functioning at its best, invest in useful laser level accessories like mounts and target plates. Proper maintenance and storage are vital; clean the device regularly, especially after use outdoors, and store it in a protective case to prevent damage. This care extends your laser level’s lifespan and maintains its accuracy. Additionally, understanding projector contrast ratio can help you select the right device for your needs, ensuring optimal image quality. When you prioritize proper maintenance and utilize accessories effectively, you’ll find your DIY projects become easier, more precise, and look polished. A reliable laser level combined with proper care makes any DIY project feel professional. Additionally, choosing a laser level from reputable Gold IRA markets ensures the device is built with quality materials that withstand regular use and outdoor conditions. Regular calibration and attention to laser level accuracy will further enhance your project results. Incorporating energy-efficient tools can also contribute to more sustainable DIY practices, aligning with environmentally conscious goals. Furthermore, understanding the science of light projection can help you troubleshoot common issues and optimize your laser level’s performance.
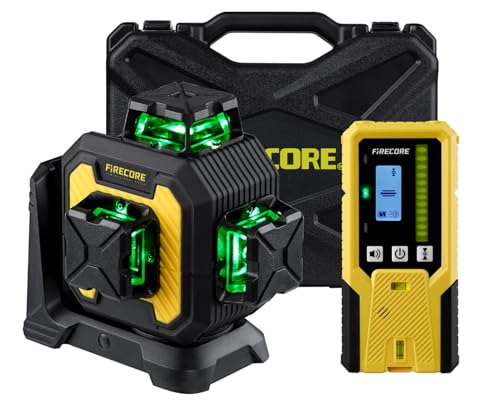
Firecore Laser Level with Receiver Kit, 1/13" High Accuracy, Laser Level 360 Self Leveling with Pulse Mode for Outdoor Up To 197ft, Rechargeable Green Line Laser for Home Renovation Construction-F93
【HOW TO CORRECTLY SETUP OUTDOOR PULSE MODE】① Due to strong outdoor sunlight, the laser line may be difficult…
As an affiliate, we earn on qualifying purchases.
As an affiliate, we earn on qualifying purchases.
How Laser Levels Help You Achieve Precise Results
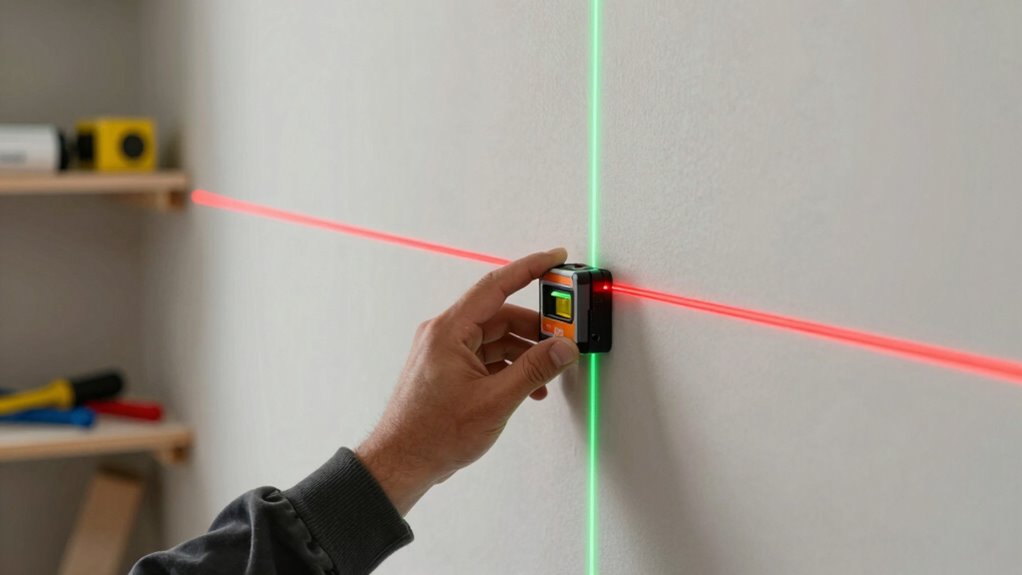
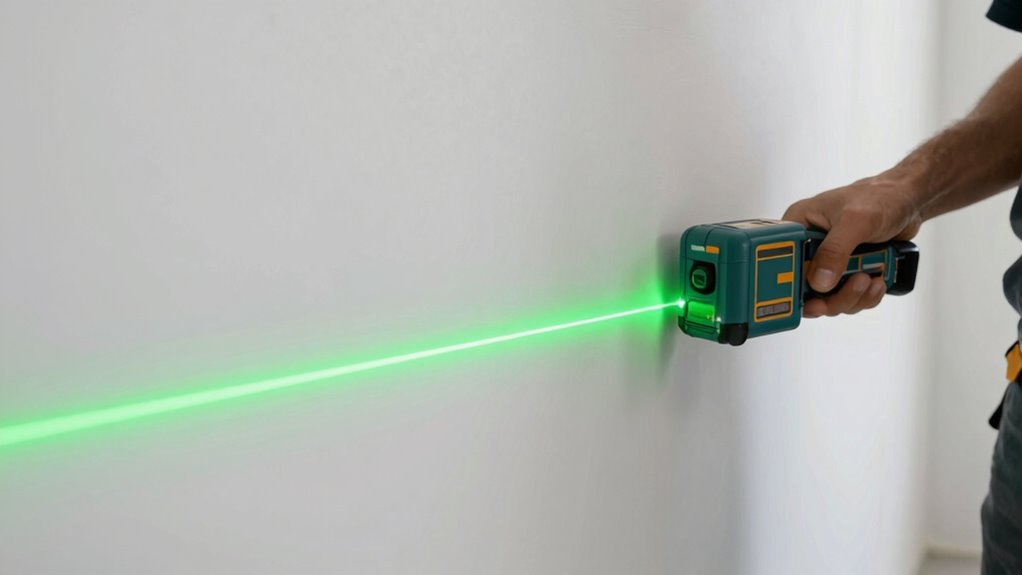
Laser levels help you achieve precise results by projecting clear, straight lines that serve as reliable guides during your DIY projects. With various color options, such as red or green beams, you can choose the best visibility for your working environment. Longer battery life guarantees your laser level stays operational through extended tasks, reducing interruptions. These tools eliminate guesswork, allowing you to align pictures, tiles, or shelves perfectly. Additionally, the sustainable use of laser levels supports your long-term DIY projects by minimizing the need for frequent replacements. Incorporating energy-efficient components not only enhances performance but also contributes to environmental sustainability, making your projects more eco-friendly. When selecting a laser level, considering battery longevity can enhance your efficiency and overall project quality. Optimizing power consumption ensures your device operates effectively over time, even on lengthy projects. Consider these key benefits: – Bright, visible lines tailored to your workspace – Consistent performance with extended battery life – Clear contrast with different color options – Accurate measurements reducing errors – Ease of use, even in challenging lighting conditions Together, these features help you achieve professional-looking results every time.
Motovera Self Leveling Laser Level 100ft, Green Cross Line with Tripod, 4 Brightness Modes & Pulse Function, Manual & Self-Leveling Modes, IP54 Waterproof for Picture Hanging, Tile, DIY Construction
【Ultra-Bright Green Beam & High-Precision Accuracy】Powered by an advanced green laser diode, this tool delivers 4X the brightness…
As an affiliate, we earn on qualifying purchases.
As an affiliate, we earn on qualifying purchases.
Key Features to Consider When Buying a Laser Level

When choosing a laser level, focusing on key features guarantees you get the right tool for your projects. First, confirm the laser level offers reliable laser level calibration so your lines stay accurate over time. Look for models with self-leveling capabilities, which save you time on surface preparation by instantly adjusting to uneven surfaces. Brightness and visibility are also essential—select a laser with a high-lumen output for clear lines even in well-lit areas. Consider the working range to match your project size, and check for durable, weather-resistant construction if you’ll be working outdoors. Additionally, features like multiple line options and adjustable angles can enhance versatility. Prioritizing these features ensures your laser level provides precise, professional results every time. Understanding laser level calibration and choosing models with reliable calibration features is essential for maintaining accuracy over the lifespan of your tool. For long-term accuracy, it’s also beneficial to select a model with easy calibration adjustments, which can save time and ensure consistent precision. Moreover, selecting a laser level with robust construction can help withstand the rigors of various work environments, ensuring longevity and consistent performance. Incorporating models with advanced leveling technology can further improve ease of use and accuracy in complex job sites. Additionally, choosing a laser level with easy-to-read displays can significantly improve usability, especially in outdoor or bright conditions.

4 Pieces Laser Targets Magnetic Floor Laser Targets Plate Laser Card with Stand for Green Laser Level Red Laser Level to Enhancing the Visibility
Package content: the package comes with 4 laser target card plates in different colors, 2 green and 2…
As an affiliate, we earn on qualifying purchases.
As an affiliate, we earn on qualifying purchases.
Best Laser Level Types for DIY and Home Projects

When choosing a laser level for your projects, you’ll want to contemplate whether a rotary or line laser suits your needs best. Self-leveling features can make setup easier and more accurate, especially for complex tasks. Understanding these options helps you pick the right tool to get professional results at home. Additionally, considering the application environment and your specific project requirements can ensure you select the most effective laser level for your DIY endeavors. Being aware of lease terms related to equipment rental or purchase may also influence your decision if you plan to use the laser level multiple times. Knowing about laser level accuracy can help you choose a device that meets your precision needs without unnecessary expense. Incorporating smart home integration features can also enhance your setup, allowing for easier calibration and remote operation through compatible devices. Recognizing the importance of device durability can help ensure your laser level withstands regular use in various work conditions.
Rotary vs. Line Lasers
Choosing between rotary and line lasers depends on your specific DIY or home project needs. Rotary lasers project a 360-degree beam, ideal for large-scale tasks like leveling over long distances, especially outdoors. Line lasers emit precise, straight lines for interior projects such as tiling or cabinetry. When selecting laser level accessories, consider compatibility with your laser level brands for better performance. Rotary lasers are more versatile but often more expensive and require power sources. Line lasers are simpler, portable, and easier to set up. Think about the scope of your project, the environment, and whether you need visible lines or full-area coverage. Both types can deliver professional results when paired with the right laser level accessories, making your DIY projects look polished and accurate. Additionally, understanding water-related tools and environments can help you better prepare for outdoor or waterproof applications when working on projects near water or in humid conditions. Properly managing outdoor conditions such as humidity and moisture is essential for maintaining laser accuracy and equipment longevity. For outdoor projects, considering weather resistance features in your laser level can significantly improve durability and performance. Being aware of waterproof and dustproof ratings can help you select a laser level suitable for challenging outdoor environments.
Self-Leveling Features
Self-leveling features markedly simplify your DIY projects by automatically aligning the laser beam, saving you time and reducing errors. With self leveling technology, the laser level detects uneven surfaces and performs automatic adjustment, ensuring an accurate and straight line every time. This feature eliminates the need for manual calibration, making setup faster and more reliable. Whether you’re hanging shelves, installing tiles, or framing walls, self-leveling laser levels keep your work precise without constant manual corrections. Many models have a self-leveling range, so if the surface is too uneven, the laser will alert you or stop functioning until repositioned. This automatic adjustment makes DIY tasks more efficient, letting you focus on the project instead of fussing with alignment.
Setup Tips for Accurate and Safe Laser Level Use
To guarantee your laser level provides accurate results and remains safe to use, proper setup is essential. First, ensure the device is on a stable, level surface or securely mounted to avoid misalignment. Always follow laser safety guidelines, such as wearing appropriate eye protection and avoiding direct eye exposure to laser beams. Check the battery regularly and maintain proper battery maintenance by removing batteries when not in use for extended periods to prevent leaks. When setting up, verify the laser is calibrated correctly, and avoid adjusting it during use to maintain accuracy. Keep the workspace clear of obstructions that could interfere with the laser line. Lastly, store your laser level in a safe place to prevent damage and ensure consistent performance.
Common Mistakes to Avoid When Using Laser Levels

Make sure you calibrate your laser level properly before each use, or you risk inaccurate results. Don’t ignore surface conditions like dust or unevenness, as they can distort the laser beam. Finally, guarantee your device is correctly aligned; otherwise, your measurements could be off.
Improper Calibration Practices
Improper calibration is a common mistake that can compromise the accuracy of your laser level. Calibration errors often lead to misaligned beams, causing uneven measurements and flawed projects. To avoid this, verify your device is properly calibrated before each use. Failures to do so can result in inaccurate lines, wasted materials, and rework. Keep these points in mind:
- Regularly check calibration against a known level or reference point
- Follow the manufacturer’s calibration instructions carefully
- Avoid calibrating on uneven or unstable surfaces
- Use the correct tools to verify alignment
- Re-calibrate after drops or impacts
Addressing calibration errors upfront ensures your laser level delivers precise, professional results. Proper calibration maintains reliability, saving you time and frustration on your DIY projects.
Ignoring Surface Conditions
Ignoring surface conditions is a common mistake that can throw off the accuracy of your laser level. Before starting, guarantee proper surface preparation by cleaning dust, debris, and uneven spots that could interfere with the laser beam. Environmental factors like vibrations, temperature changes, and moisture can also affect the laser’s accuracy. If the surface isn’t stable or smooth, the laser line may appear distorted or shift, leading to errors. Always check the workspace and make adjustments as needed—use leveling tools or supports if necessary. Taking the time to prepare surfaces and account for environmental conditions ensures your laser level provides precise, reliable lines. Skipping this step can result in misaligned projects, wasted materials, and frustration. Proper surface condition management is essential for professional-looking results.
Incorrect Alignment Techniques
One common mistake when using laser levels is misaligning the device, which can lead to inaccurate measurements and crooked lines. Misaligned beams often occur if you don’t properly calibrate or secure the laser level, especially on uneven surfaces. To avoid this, ensure the device is level and stable before starting. Be cautious of uneven surfaces that can cause the laser to shift or produce skewed lines.
Remember to:
- Double-check calibration before use
- Use a tripod or stable surface
- Avoid placing the laser on uneven flooring
- Keep the laser level steady during operation
- Regularly verify beam alignment throughout the project
Frequently Asked Questions
Can Laser Levels Be Used Outdoors in Bright Sunlight?
Yes, laser levels can be used outdoors in bright sunlight, but their laser beam visibility may be impacted by outdoor lighting challenges. To guarantee accuracy, choose a laser level with a bright, green laser, as it’s more visible in sunlight compared to red lasers. You might also consider using a laser detector or target to improve visibility and maintain precision during your outdoor projects.
How Long Do Laser Levels Typically Operate on a Single Battery?
Your laser level typically operates for about 8 to 20 hours on a single battery, depending on the model and usage. Battery life varies with power management features, so look for units with efficient energy use to maximize run time. To guarantee continuous work, consider carrying spare batteries or using rechargeable options. Proper power management helps maintain laser accuracy and extend device longevity, making your DIY projects more efficient.
Are Laser Levels Suitable for Ceiling Installation Projects?
Yes, laser levels are suitable for ceiling installation projects. You can easily use them for ceiling mounting, as they provide precise alignment accuracy, ensuring your fixtures or tiles are perfectly level. Just set up the laser level securely, and it will project straight lines or points on the ceiling, making your installation straightforward and professional-looking. Their accuracy and ease of use make them an excellent choice for ceiling projects.
What Is the Average Lifespan of a Typical Laser Level Device?
You can expect a typical laser level device to last around 3 to 5 years, depending on how often you use it and how well you maintain it. Battery life plays a vital role; rechargeable batteries usually last longer with proper care. The device’s durability also impacts lifespan—look for sturdy models designed to withstand drops and rough handling. Regularly replacing batteries and handling it carefully can extend your laser level’s usefulness.
Do Laser Levels Require Calibration Before Each Use?
You don’t need to calibrate your laser level before each use, but it’s important to check calibration regularly. Calibration frequency depends on how often and intensively you use it, with more frequent use requiring more frequent checks. Proper calibration helps maintain accuracy, ensuring your measurements stay precise over time. If you notice errors or drops in accuracy, calibrate immediately to keep your laser level reliable for your DIY projects.
Conclusion
With the right laser level, your DIY projects can look professionally done. Imagine hanging a gallery wall perfectly aligned on your first try—no more guesswork or uneven lines. A friend once struggled with crooked shelves until they used a laser level, transforming their space effortlessly. Don’t settle for amateur results; invest in a laser level and watch your home improvements become precise, safe, and truly impressive. Your future self will thank you for making the smart choice.