
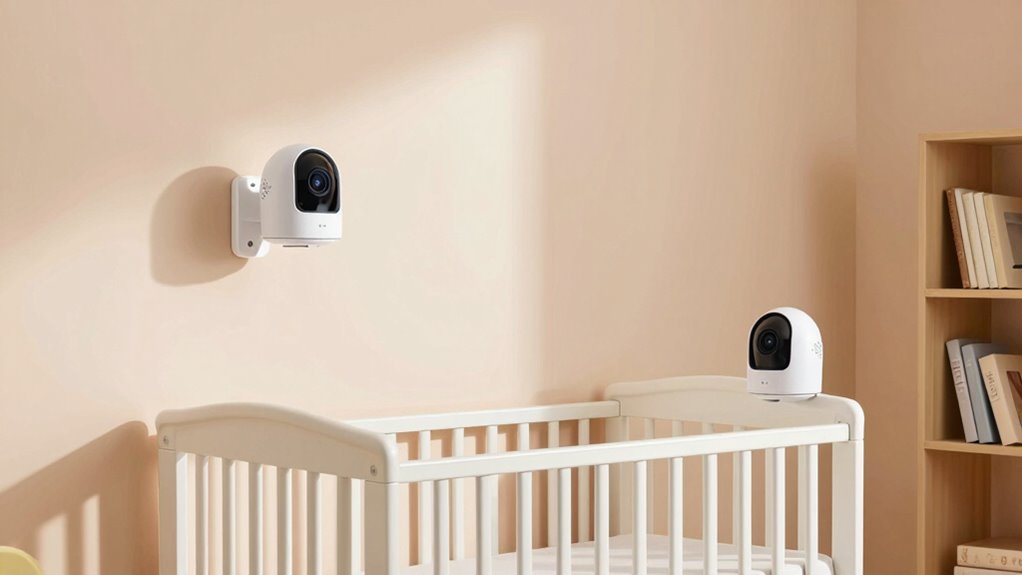
To cover your crib and room effectively, place one camera at crib height near a corner with good lighting to get a clear view of the sleeping area. Mount the second camera higher up, angled to monitor the entire nursery and key areas like doorways or changing stations. Use adjustable mounts and fine-tune angles for the best coverage and avoid blind spots. Keep furniture and reflective surfaces out of the way for clearer views—if you continue, you’ll discover more expert tips.
Key Takeaways
- Mount one camera high in a corner to cover the entire room, including the crib, avoiding direct sunlight and glare.
- Position the second camera at crib height to capture detailed sleep and movement within the crib area.
- Use adjustable mounts and swivel joints to fine-tune angles for maximum coverage of critical zones.
- Avoid placing cameras behind furniture or reflective surfaces; keep views clear of obstructions.
- Test multiple angles and heights to optimize coverage, ensuring both cameras complement each other for complete monitoring.
Why Two Cameras Improve Baby Room Coverage

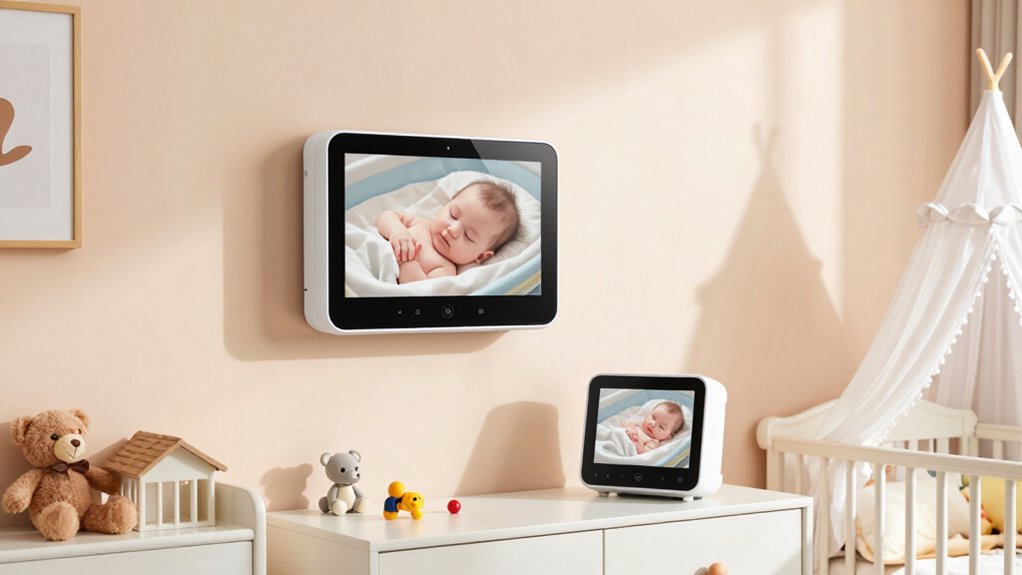
Using two cameras in a baby monitor considerably enhances your ability to keep an eye on your little one. With multiple angles, you can better monitor your baby’s movements and guarantee their safety, especially during nap times or overnight. This setup also helps you observe baby sleep patterns more accurately, so you can identify when they’re restless or settling well. Plus, it allows you to keep an eye on the nursery decor, making sure everything is in place and safe. Having two perspectives minimizes blind spots, giving you peace of mind and a clearer picture of your baby’s environment. Additionally, understanding camera placement strategies can optimize coverage and ensure all critical areas are monitored effectively. Proper load‑planning is essential to ensure your system is reliable and can handle the additional equipment. Ensuring your cameras are positioned at appropriate height and angle can further improve coverage and clarity. Ultimately, this improves your responsiveness, helping you provide a secure, comfortable space for your little one to rest and grow. To maximize effectiveness, consider camera placement that covers both the crib and the room-wide view, and use adjustable mounts to fine-tune angles as needed.
How to Find the Best Spot for Your Crib Camera
Finding the right spot for your crib camera can make a significant difference in how well you can monitor your baby. Choose a location with good nursery lighting, avoiding harsh direct sunlight or deep shadows that could obscure your view. Position the camera at a height where it captures the entire crib without being blocked by wall decorations or wall-mounted items. Make sure wall decorations are not in the camera’s line of sight or could accidentally be knocked over. Aim for a corner that provides a clear, unobstructed view of the crib and the surrounding space. Keep the camera angle level to avoid distortion, and test different spots before settling. This guarantees you get a stable, all-encompassing view of your little one’s environment. Additionally, considering the camera’s resolution and contrast ratio can help ensure the image quality remains clear and detailed from your chosen vantage point. Proper placement also involves evaluating video quality features, which can impact how well you can see your baby in various lighting conditions. Ensuring that the camera is positioned within the optimal field of view can further enhance your monitoring effectiveness. To optimize your setup, also consider the camera’s placement flexibility, allowing you to easily adjust angles as needed for different situations. Understanding the importance of placement can help you choose the best spot for consistent and reliable monitoring.
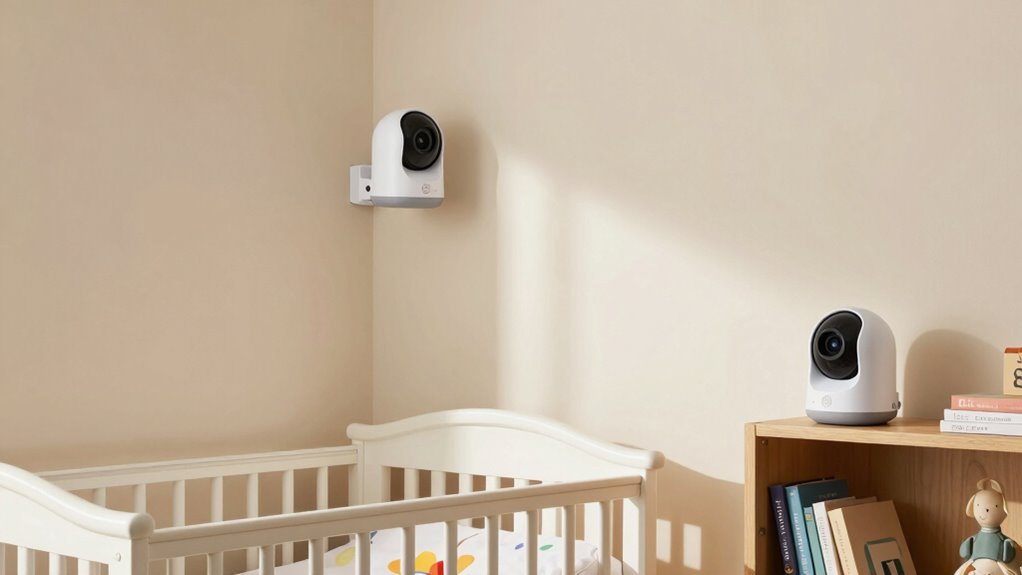
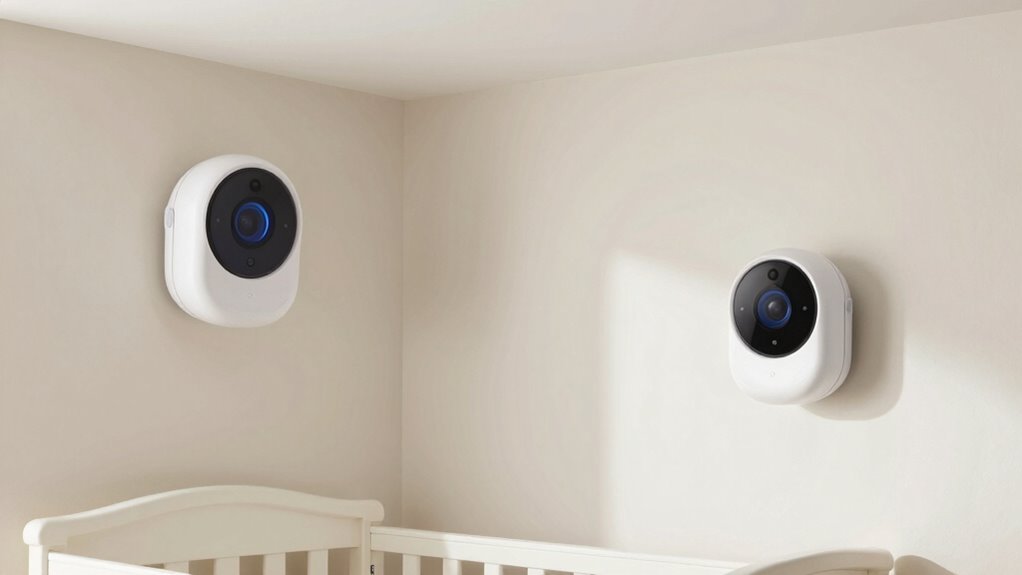
Positioning the Room Camera for Full-View Monitoring
To achieve full-view monitoring of your baby’s room, you need to carefully choose the camera’s placement. Position the camera where nursery lighting won’t cause glare or shadows that obscure the view. Ideally, place it at a high angle near a corner, capturing the entire room without blind spots. This placement ensures you get a clear, wide-angle view of your baby’s activities. Keep in mind that good audio monitoring is also essential, so position the camera where sound flows freely without obstructions. Avoid placing the camera directly facing windows or bright light sources, as these can diminish image quality. A strategic spot allows you to monitor both visual activity and audio cues, giving you peace of mind and full-room coverage. Incorporating local automation features can further enhance your monitoring setup by allowing customized alerts and routines based on your baby’s movements or sounds. Additionally, understanding camera placement best practices can help you optimize your setup for maximum coverage and safety.
Using Your Room Layout to Optimize Camera Placement
To get the most out of your baby monitor, consider how your room layout influences camera placement. You’ll want to maximize coverage while avoiding obstructions from furniture. Planning your setup carefully ensures you keep an eye on your little one from every angle. Incorporating art care principles can also help you create a safe and harmonious environment for your baby. Additionally, understanding automotive repair basics such as proper inspection and maintenance can inspire you to regularly evaluate your setup for safety and efficiency. Paying attention to space optimization techniques can further improve your monitoring coverage and overall room safety, especially by considering device and network security to protect against hacking attempts. Proper sensor placement can also help ensure clear video feeds and reduce blind spots.
Maximize Room Coverage
Maximizing room coverage begins with understanding your room’s layout and strategically placing your cameras accordingly. Consider your nursery decor and identify key areas to monitor, such as the crib and main activity zones. Use the table below to plan camera positions based on room features:
| Area to Cover | Ideal Camera Placement | Notes |
|---|---|---|
| Crib | Corner behind or beside crib | Avoid glare, ensure wide view |
| Play Area | Opposite wall or ceiling mount | Capture entire space |
| Entry Points | Doorway corners | Monitor door activity |
| Room Perimeter | High vantage points | Oversee the entire room |
| Storage & Clutter | Near shelves or closets | Minimize blind spots |
Choose reliable camera brands, and match camera placement to your nursery decor for seamless monitoring. Additionally, selecting a two-camera baby monitor setup can help ensure comprehensive coverage of both the crib and the room at large.
Consider Furniture Placement
While planning your nursery layout, consider how your furniture placement can enhance camera coverage. Position essential furniture, like cribs and changing tables, to avoid blocking camera views and ensure clear sightlines. Keep in mind nursery decoration, choosing pieces that complement the room without cluttering or obstructing your cameras. Prioritize furniture safety by securing heavy items and avoiding sharp edges near camera angles. Placing furniture strategically allows your cameras to capture the entire crib and room effectively, minimizing blind spots. Avoid overcrowding, which can hinder camera movement and compromise monitoring. Use open space thoughtfully, ensuring your baby’s safety while optimizing camera positions. Thoughtful furniture placement not only improves coverage but also creates a safe, visually appealing nursery environment.
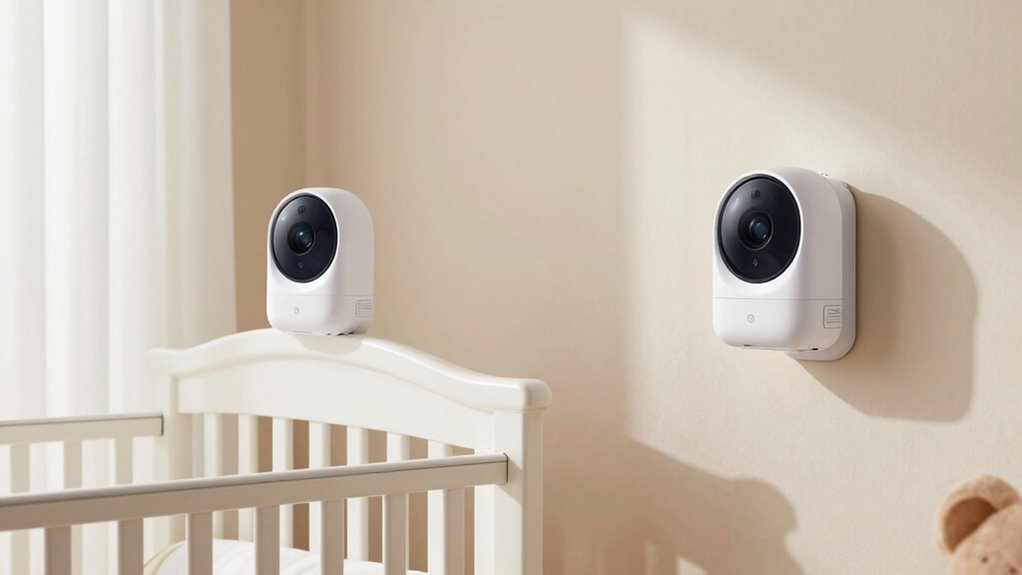
Tips for Mounting Cameras to Minimize Blind Spots
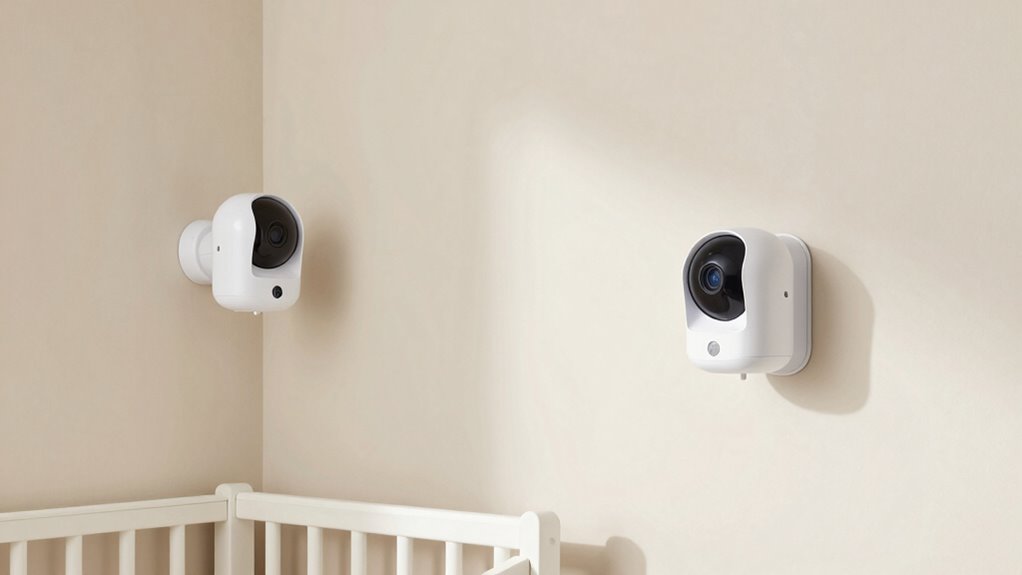
Properly mounting your baby monitor cameras is essential for eliminating blind spots and ensuring thorough coverage of the nursery. Start by choosing a camera angle that captures the entire crib and surrounding area without obstruction. Avoid pointing the camera directly at bright windows or light sources, which can cause glare and reduce visibility. The mounting height matters—install cameras high enough to cover a wide area while avoiding blind spots underneath or behind furniture. Use adjustable mounts or swivel joints to fine-tune the angle for ideal viewing. Test the camera’s view from different positions to identify any gaps or shadows. Consistent positioning helps maintain reliable coverage, so take your time to find the best mounting spots that minimize blind spots and maximize visibility. If possible, consider proper placement techniques to further enhance coverage and reduce potential blind spots. Additionally, consulting product manuals can provide specific guidance for your camera model to optimize placement. Employing coverage optimization strategies can also be beneficial to ensure comprehensive monitoring of the entire room. Paying attention to lighting conditions can help improve video clarity and overall visibility.
How to Adjust Camera Angles and Settings for Clearer Viewing
Adjusting your baby monitor’s camera angles and settings is crucial for achieving a clear, reliable view of your nursery. Start by adjusting the camera tilt to capture the crib and surrounding area without blind spots. Use the lens zoom feature to focus on specific details or widen the view of the room. This ensures you get a sharp image regardless of lighting or movement. Incorporating essential oils for respiratory health can help create a calming environment that makes it easier to monitor your baby comfortably. Additionally, experimenting with camera placement strategies can optimize coverage and minimize blind spots. Regularly check and fine-tune these settings to maintain ideal clarity and coverage, especially when considering best gelato flavors that might make your nursery visits more enjoyable.
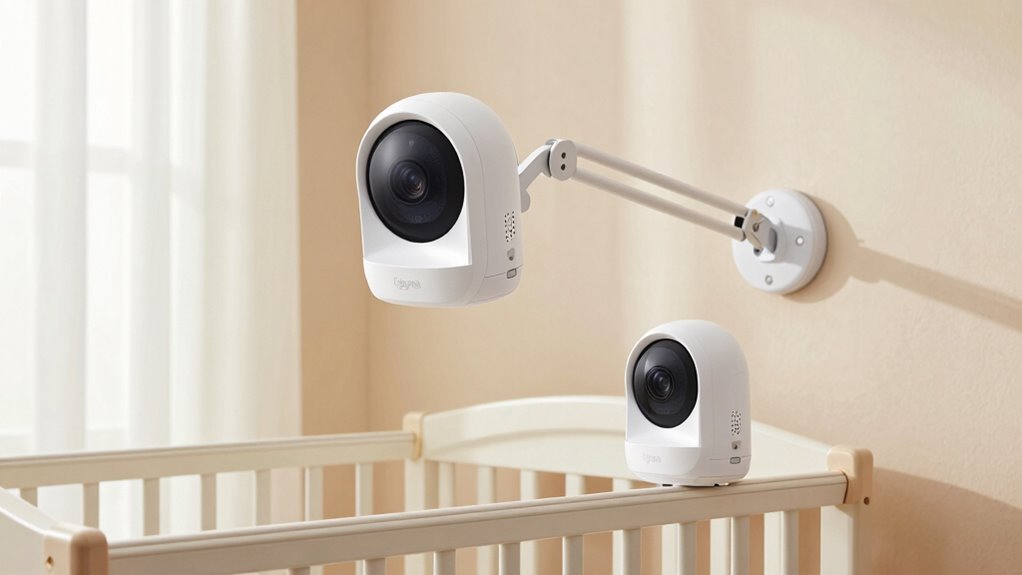
Enhancing Coverage With Mounts and Accessories

Using mounts and accessories can particularly improve your baby monitor’s coverage by allowing you to position the camera at ideal angles and locations. Camera mounts offer flexible options to secure your cameras on walls, shelves, or cribs, giving you better control over what you see. Accessory options like swivel mounts, extension arms, and tilt adapters help you adjust the camera’s view easily, ensuring no blind spots. These tools are especially useful for covering larger areas or tricky spots around the room. By selecting the right camera mounts and accessory options, you can optimize your monitor’s placement, making sure you keep a close eye on your baby from different angles. This flexibility enhances security and peace of mind, so you can focus on other tasks while staying connected.
Common Placement Mistakes to Avoid and How to Fix Them
Many parents make mistakes when placing baby monitors that can leave blind spots or reduce visibility. You might overlook the importance of camera angles or set the cameras too low or high, affecting your view. Fixing these issues is simple once you understand how to position the cameras correctly for best coverage.
Ignoring Camera Angles
Ignoring camera angles is a common mistake that can leave you with a less effective view of your baby’s environment. Poor angles may cause issues like blurry images or distorted views due to improper camera tilt or lens distortion. To fix this:
- Adjust the camera tilt so the lens faces directly at your baby’s crib or play area, avoiding downward or upward angles that cause distortion.
- Use a stable mount to prevent unnecessary movement and maintain the desired angle.
- Avoid placing cameras too close to walls or reflective surfaces that can create glare or lens distortion.
- Regularly check the view on your monitor to ensure the angle captures the full scene without skewed perspectives. Proper positioning enhances clarity and security.
Overlooking Blind Spots
Overlooking blind spots can substantially reduce the effectiveness of your baby monitor. To improve coverage, focus on blind spot mitigation by carefully evaluating your room layout. Don’t rely on a single camera angle; instead, position cameras to cover all critical areas, including corners and near the crib’s edges. Adjust camera angles to avoid obstructions and ensure a clear view of your baby’s entire sleeping area. Avoid placing cameras directly behind furniture or too close to walls, which can create hidden spots. Regularly appraise footage to identify any blind spots and tweak your camera placements accordingly. By optimizing camera angles and considering blind spot mitigation, you’ll ensure comprehensive coverage, giving you peace of mind and better supervision of your little one.
Incorrect Height Placement
Placing your baby monitor at the wrong height can substantially limit its effectiveness, creating blind spots or blurry images. To avoid this, consider these tips:
- Keep the camera at eye level or slightly above, ensuring a clear view of the crib and room.
- Avoid placing the camera too high, which can cause lighting issues and obscure details.
- Position the monitor near a power outlet without stretching cords across walkways to prevent accidental disconnections.
- Be mindful of lighting sources; direct sunlight or bright lamps can cause glare or shadows, reducing image clarity.
Proper height placement helps maintain consistent video quality and minimizes blind spots. Additionally, consider lighting and power outlet locations for ideal camera positioning and safety.
Frequently Asked Questions
How Do I Choose Cameras With the Best Night Vision?
To choose cameras with the best night vision, look for models that use infrared technology for clear images in low light. Check their specifications for high-quality low light performance, ensuring they can capture detailed visuals even in complete darkness. Opt for cameras with adjustable IR LEDs and wide viewing angles, so you get all-encompassing coverage of your baby’s room. Reading reviews can also help identify reliable options with excellent night vision capabilities.
Can Cameras Be Safely Used Around Electrical Outlets?
Yes, cameras can be safely used around electrical outlets if you follow proper electrical safety and camera placement guidelines. Make certain cords are tucked away or secured to prevent tripping or pulling, and avoid placing cameras directly on outlets or power strips. Use outlet covers if needed, and keep cords out of children’s reach. Properly securing the camera and cords helps maintain safety while keeping an eye on your little one.
What Is the Ideal Distance Between Two Cameras?
You should place your cameras about 8 to 10 feet apart for ideal coverage. Consider wiring considerations when planning camera placement, making sure cords are safely tucked away and out of reach. Proper camera placement involves avoiding blind spots and maintaining a clear view of the crib and room. Keep a safe distance between cameras to prevent interference and ensure each device has a strong signal for reliable monitoring.
Are There Specific Brands Recommended for Dual-Camera Setups?
For dual camera systems, popular brand recommendations include Infant Optics, Arlo, and Nanit, as they offer reliable performance and easy setup. These brands provide excellent features like wide-angle views, night vision, and secure connections, making them ideal for monitoring your baby from multiple angles. When choosing, consider compatibility with your existing setup and your specific needs for coverage, ensuring you get the best value and peace of mind.
How Often Should I Test Camera Angles for Optimal Coverage?
Think of it as tuning a fine instrument—you should test your camera angles regularly. You’ll want to do coverage testing frequency at least once a week, especially after rearranging furniture or changing room lighting. During these checks, make camera angle adjustments as needed to make sure full coverage of the crib and room. Consistent testing guarantees you catch any blind spots early, keeping an eye on your little one’s safety and comfort.
Conclusion
With two cameras, you gain peace of mind, knowing every corner of your baby’s room is covered. Think of it as the difference between a single, limited view and a full, comforting panorama. While technology helps, your thoughtful placement creates a safe, nurturing space. So, invest time in positioning your cameras wisely—because in the end, it’s the little details that keep your baby safe and your heart at ease.